How to Add Subtitles in iMovie
- Published On

Setting Up Your Project

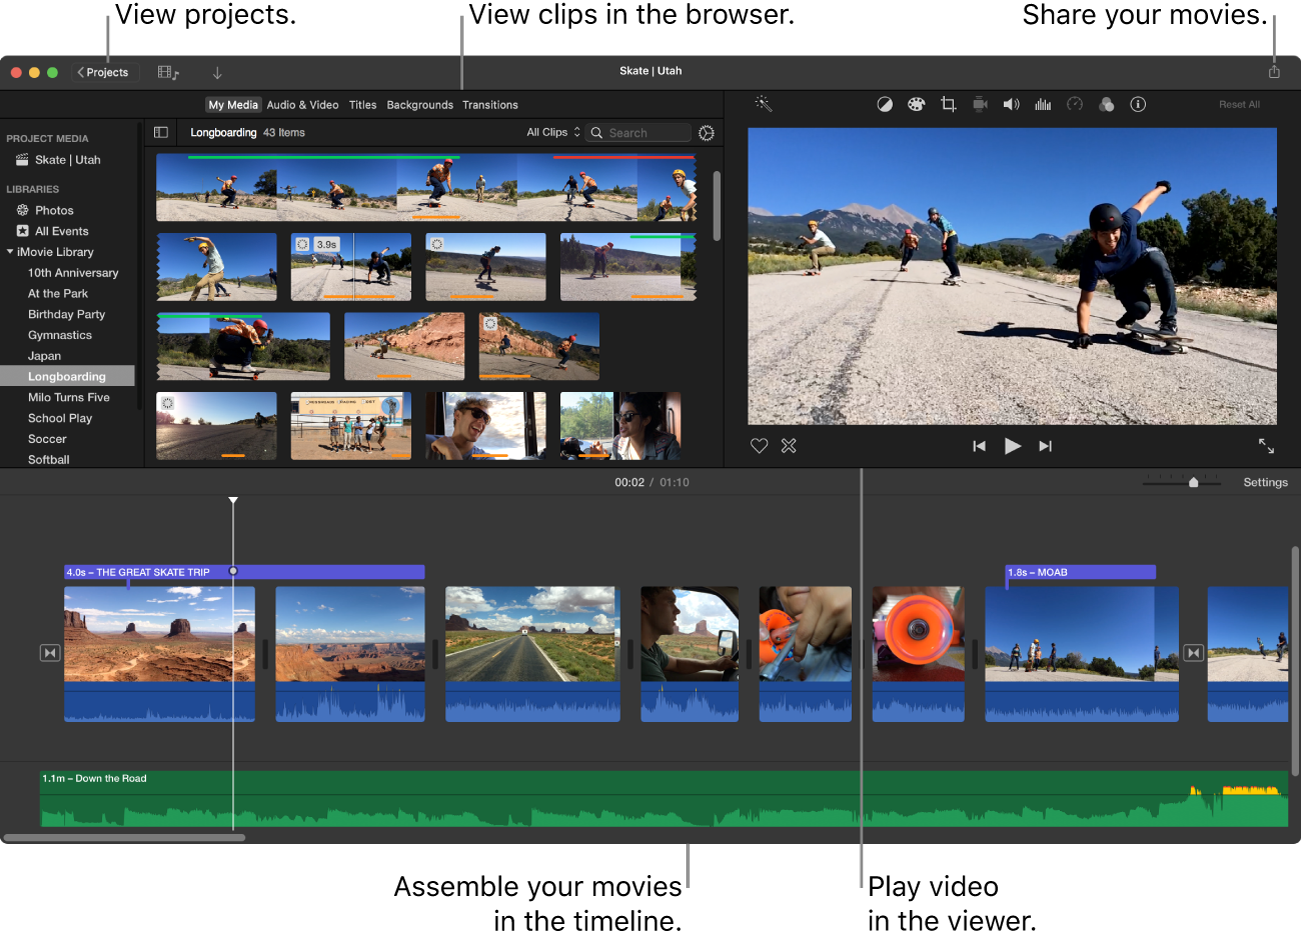
Once you've successfully imported your video file, it's time to set up your project to start adding those all-important subtitles. First things first, make sure you've selected the correct project timeline. If you haven't created a project yet, no worries—just head over to "File" > "New Project" to get started. You'll be prompted to choose between "Movie" or "Trailer" as your project type. Go ahead and click "Create" to move forward.
Now, take a look at your project timeline. You'll notice that the video file you imported has automatically been added to it. If you need to tweak the order of your clips, simply drag and drop them into the desired position. Easy, right?
Picking the Perfect Caption Style

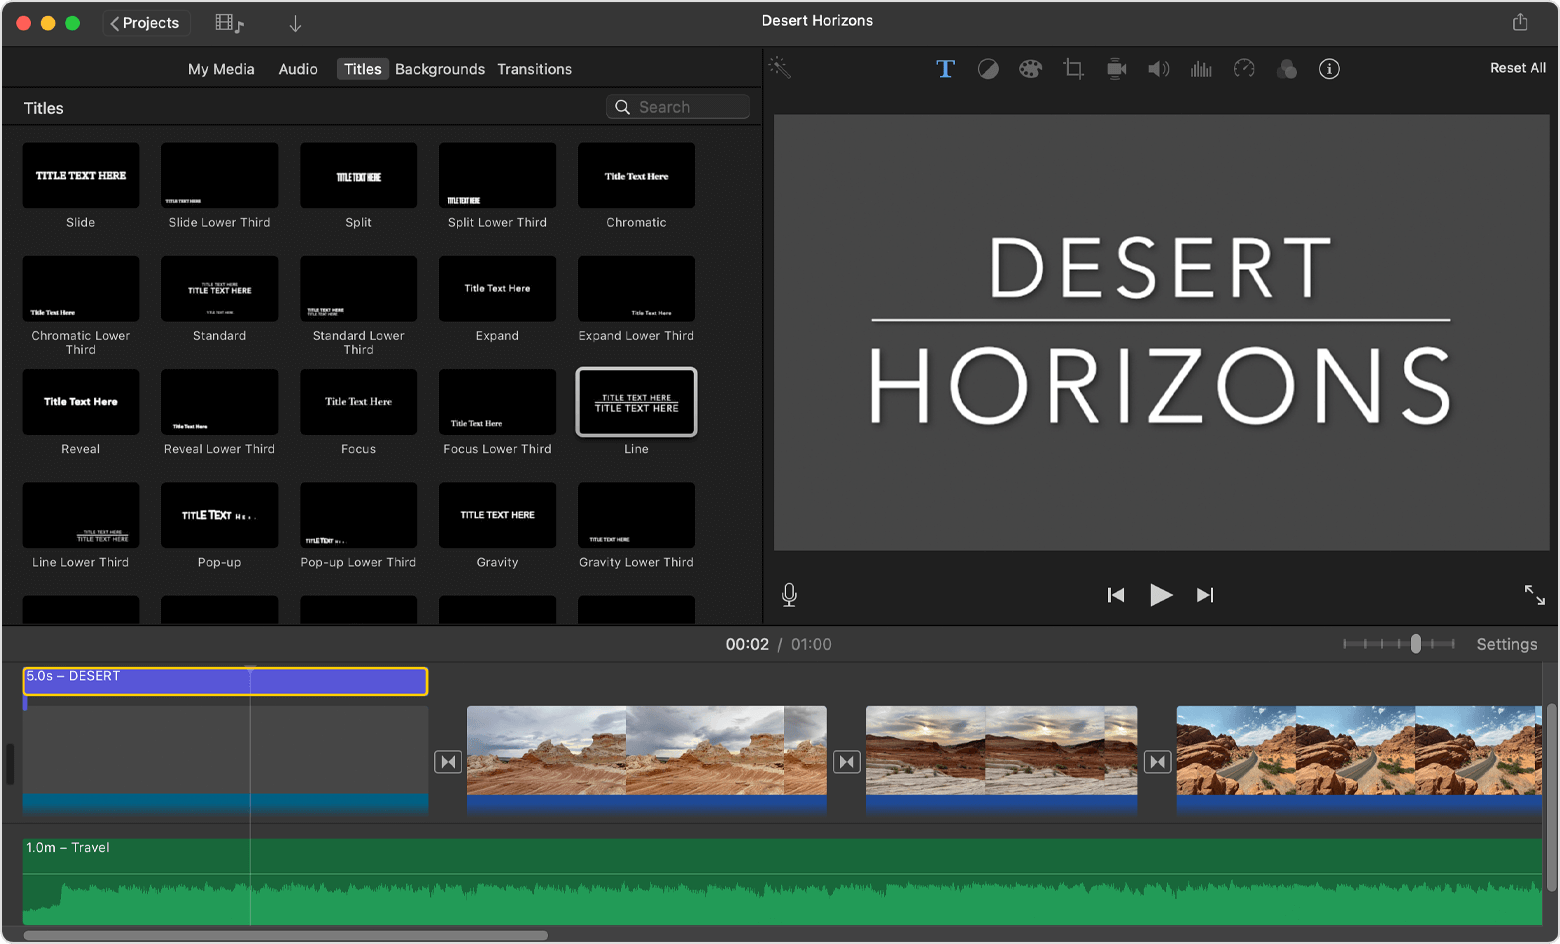
When it comes to adding captions in iMovie, the first thing you'll want to do is find a style that fits your video's vibe. Head over to the "Titles" button, which you'll spot right above the media library. Give it a click, and voilà—you're greeted with a menu full of caption styles to choose from.
Now, here's where it gets fun. Take your time scrolling through the options. You'll notice some classics like "Lower Third" and "Standard." These are go-tos for a reason—they're clean, easy to read, and work well in most situations. But don't be afraid to experiment! Sometimes, a less conventional style can add just the right touch of personality to your project.
Once you've found the one that clicks, simply drag and drop it onto your timeline. The captions will magically appear in the right spot on your video. It's almost like adding a sprinkle of magic dust—suddenly, your video feels more polished and professional.
And here's a little tip: if you're not sure which style to pick, try previewing a few on your video. Sometimes, seeing them in action makes the decision a whole lot easier. After all, captions aren't just about readability—they're about enhancing your story. So, take a moment to find the style that truly speaks to your vision.
Adding and Customizing Subtitles
Adding subtitles in iMovie is a breeze. Start by dragging your chosen title style onto the timeline, placing it exactly where you want the subtitle to appear. Take a moment to preview the window to see how it looks—it’s like giving your video a quick dress rehearsal.
Now, double-click the text box in the timeline and type in your subtitle. Keep it short and sweet, ideally under 70 characters. Why? Because less is more when it comes to subtitles. It’s not just about fitting the words on the screen; it’s about making sure they flow naturally with the video, like a well-timed dance.
But don’t stop there—make it your own. Play around with the font, color, and size to match the vibe of your video. iMovie offers a variety of preset styles, but don’t be afraid to tweak the details. After all, it’s the little things that make your video stand out. Think of it as adding the perfect seasoning to a dish—subtle, but it makes all the difference.
Fine-Tuning Your Subtitles
Once you've added subtitles in iMovie, you might find that they don't quite sync up with the audio or the action on screen. It's a common hiccup, but thankfully, it's an easy fix. Here's how you can tweak the duration of your subtitles to get them just right.
First, locate the subtitle clip in your timeline. It's usually right there, nestled among your video clips. Click on it to select it—you'll know it's selected when you see those little handles on either side.
Now, here's where the magic happens. Hover your cursor over the left or right edge of the subtitle clip. You'll notice the cursor changes into a double-headed arrow. That's your cue. Click and drag the edge to the left to shorten the subtitle, or to the right to lengthen it. It's like stretching or squeezing a piece of elastic—you're adjusting it to fit just right.
Once you've made your adjustments, hit play and watch the magic unfold. Do the subtitles now match the rhythm of the dialogue or the action? If they're still a bit off, don't worry. Just go back and tweak the edges a little more. It's a bit like tuning a guitar—small adjustments can make a big difference.
Before you know it, your subtitles will be perfectly in sync, enhancing your video without distracting from it. It's a small step, but it makes a world of difference in the final product.
Double-Check and Share Your Masterpiece
After pouring your heart into adding those perfect subtitles, it's time to give your video one last look. Hit play and watch it through, keeping an eye out for any sneaky typos or awkward phrasing. Trust me, even the tiniest mistake can stick out like a sore thumb! Pay close attention to how the text dances with the visuals – are the words popping up at just the right moments? If something feels off, don't worry, you can always tweak it until it's spot on.

Once you're absolutely thrilled with how everything looks and feels, it's showtime! Head up to the "File" menu in the top corner, and choose "Share" followed by "File." Here's where you get to decide how your video will shine – pick a resolution that makes your content look its best. Going for that crisp, high-definition look? Or maybe you want to keep the file size down for easy sharing? The choice is yours!
With a quick click on "Next" and choosing where to save your masterpiece, you're all set. Before you know it, your video, now complete with those polished subtitles, is ready to take the world by storm. Whether you're sharing it with friends or posting it online, you can be proud of the professional touch you've added. Go ahead, hit that upload button and watch your creation come to life!
Say Goodbye to Manual Subtitles with VideoToText
Let's face it—manually transcribing and syncing subtitles can be a real headache. The endless rewinding, typing, and proofreading can make even the most patient editor want to throw in the towel. That's where VideoToText's auto subtitle generator comes in, turning what used to be a tedious chore into a breeze.

Step 1: Upload Your Video
Head over to VideoToText's website and hit the "Upload Video" button. Whether your video is in MP4, MOV, or AVI format, VideoToText has got you covered. Just select your file, and you're ready to roll.
Step 2: Let the Magic Happen
Once your video is uploaded, VideoToText gets to work analyzing the audio and converting it into text. Depending on the length and complexity of your video, this process usually takes just a few minutes. It's like having a personal assistant who never gets tired!
Step 3: Tweak and Perfect
The generated subtitles will appear in an easy-to-use editing interface. Here, you can fine-tune the timing, adjust the text, and make sure everything looks just right. VideoToText's intuitive tools make it simple to get your subtitles spot-on.
Step 4: Export and Enjoy
When you're happy with your subtitles, click the "Export" button and choose your preferred format—SRT, VTT, or others. Download the file, and you're all set to import it into iMovie. Voilà! Your video now has professional-looking subtitles without the hassle.
With VideoToText, the days of painstakingly typing out subtitles are over. Whether you're working on a quick clip or a full-length feature, this tool is a game-changer for anyone looking to streamline their video editing process. Give it a try, and you'll wonder how you ever managed without it!